
50pcs LDR Photoresistor Light Sensor Photocell for Arduino, ESP32, ESP8266, Raspberry Pi
4.9Editor score
Fifty GL5516 photoresistors
Wide 3.3 to 5V compatibility
Useful for automation and tracking
Ideal for bulk prototype builds
This Light Sensor for Arduino guide compares ten analog, digital, photoresistor, photodiode, and ambient light modules for varied projects.
A light sensor for Arduino can turn changing ambient illumination into data that drives displays, lamps, robots, alarms, and automated lighting. The most useful module depends on whether your project needs a simple threshold switch, a changing analog signal, or a more precise measurement of light intensity.
We compared all ten modules by sensor type, output format, operating voltage, dimensional practicality, stated accuracy features, compatibility, and suitability for common Arduino projects. The list includes LM393 photoresistor boards, BH1750 modules, photodiode boards, standalone LDRs, and TEMT6000 ambient light sensors.
Each review explains where the product fits best, along with its key strengths and limitations. Ratings and product details reflect the supplied listings, while availability and prices change over time, so readers should confirm the latest listing details before purchasing.
4.9Editor score
4.7Editor score

4.6Editor score
This side-by-side comparison covers ten options ranging from basic standalone photoresistors to dedicated BH1750 and TEMT6000 modules, highlighting their sensor formats, outputs, voltage support, and strongest use cases.



The WWZMDiB package combines six 5mm LDR modules with an LM393 voltage comparator, making it a versatile option for Arduino light detection. Its 4.4 rating reflects a generally capable platform, particularly for projects that want both a simple switching signal and an optional analog voltage reading from the same general sensor family.
We may earn a commission when you buy through this link, at no additional cost to you.
The main strength is output flexibility. A digital output can tell the Arduino whether illumination has crossed the selected threshold, while the analog output provides a changing voltage related to the sensed light. The on-board potentiometer lets builders tune that threshold, reducing the need to move immediately into code-driven calibration for simple automatic lighting or night-detection projects.
Its limitations are equally relevant. The LDR is a relative-response component rather than a calibrated precision instrument, and its output can vary with placement, ambient conditions, and the characteristics of the selected resistor. The listing also identifies a three-pin module format, so buyers should verify which pins are available on the specific board rather than assuming every LDR module exposes identical signals.
This product is a sensible choice for robot kits, relay-controlled lamps, automatic night lights, and classroom demonstrations where a straightforward light-operated switch is needed. It is less suitable when the application demands consistent lux readings or laboratory-grade measurement. For those needs, the BH1750 options later in the guide provide a more specialized path.
The digital threshold output suits straightforward control logic, while the analog output lets a sketch observe gradual changes. That combination makes the module useful for both beginner demonstrations and more responsive automation experiments.
A built-in potentiometer provides a convenient way to set the transition point before code calibration. In practice, this can shorten setup for applications such as night lamps, line-following robots, and light-triggered relays.
We may earn a commission when you buy through this link, at no additional cost to you.
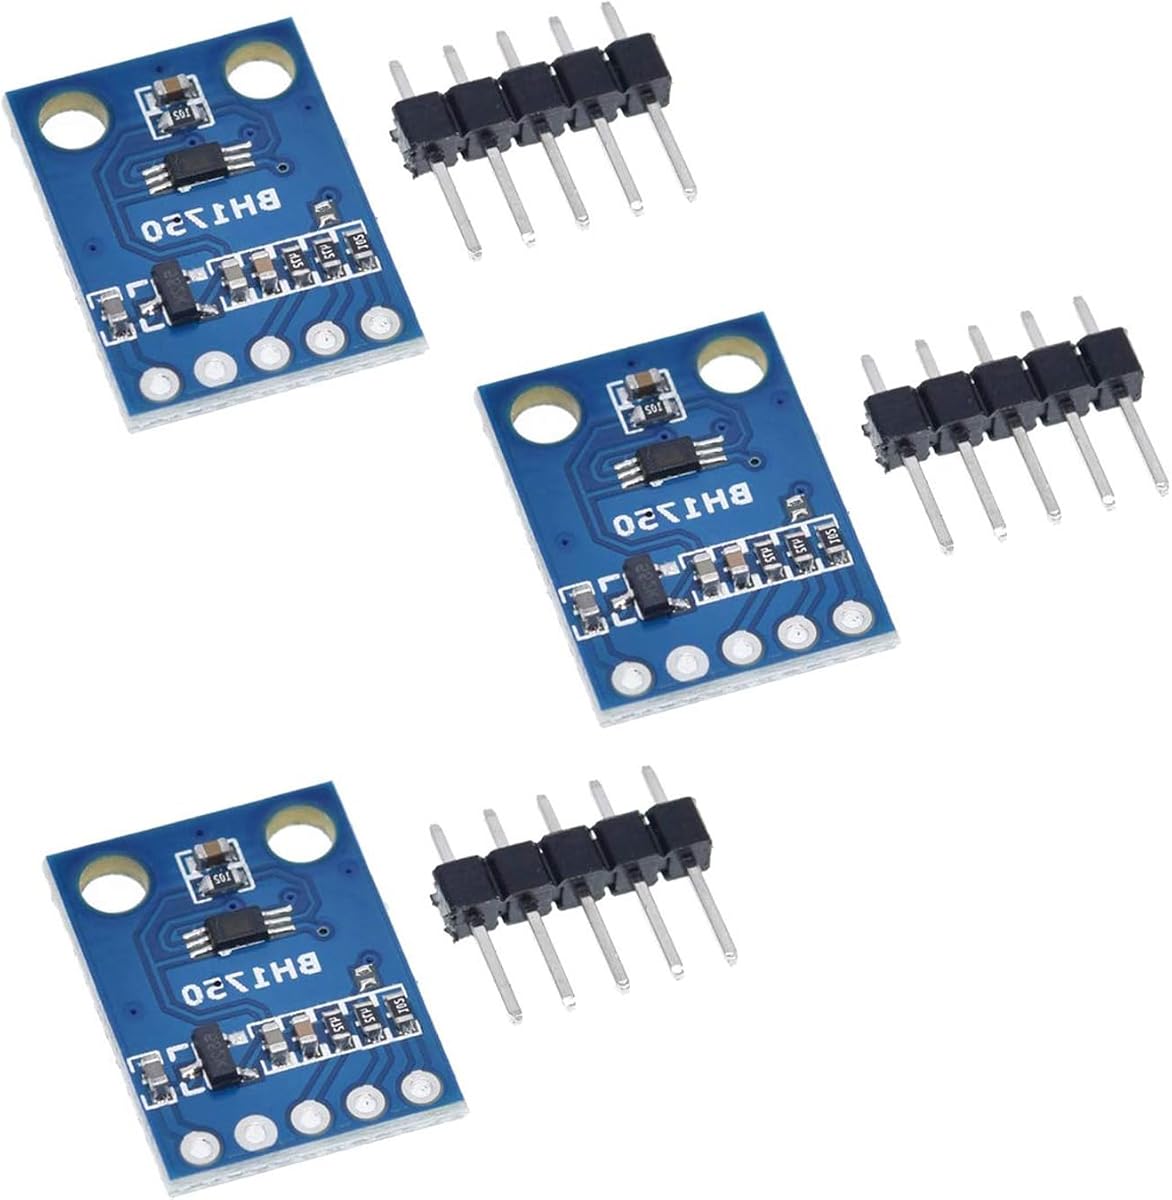
The GY-302 BH1750 is the strongest general-purpose choice in this roundup when accurate, repeatable light intensity readings matter. It carries a 4.7 rating and uses a BH1750FVI chip from ROHM, giving Arduino projects direct access to ambient light measurements rather than relying only on a resistor's changing resistance.
We may earn a commission when you buy through this link, at no additional cost to you.
Its compact dimensions of 13.9 by 18.5mm make it particularly attractive for robots, portable instruments, and installations where board area is limited. The 3 to 5V supply range supports common Arduino-compatible boards and other platforms, while the three-module pack gives makers enough units to compare sensor placement, prototype several ideas, or keep spare boards on hand.
The trade-off is that this is an I2C light sensor rather than a simple analog or digital threshold board. A project needs compatible wiring, address awareness, and suitable library support. It also measures a broader environmental response than a narrowly directional photodiode, which is useful for ambient monitoring but may not suit a tightly aimed light-seeking mechanism.
Choose this module for display brightness control, indoor illumination monitoring, educational experiments, greenhouse measurements, and Arduino projects where numerical light data is more valuable than a simple on-or-off signal. It is the most balanced recommendation for builders who want credible sensor-specific functionality without the complexity of designing their own analog measurement circuit.
The BH1750FVI is designed specifically for light intensity measurement. This makes the GY-302 more appropriate than a basic LDR when a sketch needs to compare values, log environmental conditions, or adjust output according to actual illumination.
At 13.9 by 18.5mm, the module fits easily into compact robots and embedded assemblies. Its small footprint also reduces the influence of a large support board when the sensor is mounted near an enclosure or display.
We may earn a commission when you buy through this link, at no additional cost to you.
HiLetgo's three-pack of GY-302 modules offers another route to BH1750-based measurement. The board has a 4.5 rating and explicitly identifies an original BH1750FVI chip from ROHM, which is the important component for obtaining usable light-intensity data in an Arduino sketch.
We may earn a commission when you buy through this link, at no additional cost to you.
The module measures 13.9 by 18.5mm and operates from 3 to 5V. Those characteristics make it straightforward to integrate with standard development boards and to position the sensor close to the area being evaluated. Three boards also provide flexibility for a classroom set, a multi-sensor installation, or a side-by-side environmental comparison.
Compared with an LM393 module, the GY-302 requires more deliberate software setup because it communicates over I2C. That makes it less convenient for a first project built solely around a digital trigger. It is also a broader ambient-light sensor than a directional photodiode, so it may not be the ideal component for a robot that must specifically follow a concentrated beam.
This is a good match for makers who recognize the BH1750 platform or already have an appropriate library. It suits ambient monitoring, automatic display dimming, and projects that require actual measurements rather than an adjustable threshold. Buyers should compare its current availability against the other GY-302 option in this guide before deciding.
Using an original ROHM BH1750FVI provides a defined basis for light-intensity readings. This helps when comparing the sensor with known lighting conditions or when another project already uses the BH1750 ecosystem.
Having matching modules can help reveal how placement affects measurements. They are also convenient for educational groups or multiple Arduino installations that need a consistent sensor format.
We may earn a commission when you buy through this link, at no additional cost to you.
This 10-pack of photodiode modules stands apart from the LDR options because of its directional behavior. The 4.5-rated product is designed to detect a light source positioned directly in front of the sensor, making it particularly suitable for light-seeking robots, directional alarms, and experimental rigs that need to follow a beam.
We may earn a commission when you buy through this link, at no additional cost to you.
Each 3.2 by 1.4cm board combines a 5mm photodiode with an LM393-style comparison stage. Its sensitivity is adjusted through the blue digital potentiometer, and the board exposes both a digital 0 or 1 output and an analog voltage output. The 3.3 to 5V operating range accommodates common Arduino boards, while fixing holes simplify mechanical installation.
Directionality is both its distinguishing benefit and its main constraint. The sensor does not evaluate total room illumination in the broad, ambient manner of a BH1750 or TEMT6000. Performance can change with the angle of the source, reflections, shadowing, and the distance between the light and sensor, so calibration is likely necessary for reliable results.
Buy this set when a project explicitly needs to locate or respond to a light source rather than merely detect general brightness. The ten-module quantity is useful for robotics teams, classroom exercises, or several identical prototypes. For room-level lighting automation, one of the ambient light modules is a better functional match.
The photodiode is most responsive to illumination arriving from its forward-facing side. That makes it useful when the project needs spatial awareness, such as orienting a robot toward a lamp rather than reacting equally to every bright surface.
The digital output can trigger a simple action, while the analog output allows finer comparisons. A board-level sensitivity potentiometer gives builders a quick physical adjustment before refining behavior in code.
We may earn a commission when you buy through this link, at no additional cost to you.
The EBOOT 30-piece GM5539 set is a practical component supply for makers who want to design their own light-sensitive circuits. Its 4.6 rating reflects a well-regarded option within the category, while the large quantity supports repeated tests, classroom experiments, and projects involving multiple illuminated points.
We may earn a commission when you buy through this link, at no additional cost to you.
These are standalone 5mm photoresistors rather than ready-made Arduino modules. That distinction gives builders freedom to create a voltage-divider circuit, experiment with different resistor arrangements, or integrate the sensing element into a custom printed circuit board. Each component has a maximum voltage of 150V DC, maximum wattage of 100mW, and a spectral peak at 540nm.
The trade-off is that the package does not include the convenience of a comparator, potentiometer, or labeled output pins. Users need to understand divider calculations, add their own fixed resistor, and interpret analog readings. The listed light resistance at 10 lux is 50 to 100 kilohms, but resistance can vary across individual parts and environmental conditions.
This set is best for students, educators, and experienced hobbyists who want a consumable supply of light sensors or a custom circuit. It is less suitable for someone seeking an immediate plug-and-play sensor result. For a finished module with straightforward Arduino connections, choose an LM393, BH1750, or TEMT6000 option instead.
Standalone photoresistors let designers determine the divider values, board layout, and connector arrangement. This flexibility can produce a compact custom solution when an off-the-shelf module would be too large or too general.
Thirty sensors make it possible to test tolerances, compare positions, or equip multiple students. The components are also handy for temporary prototypes before committing to a particular module design.
We may earn a commission when you buy through this link, at no additional cost to you.
The Teyleten Robot LM393 package is centered on a simple idea: detect whether ambient light is above or below a chosen threshold and present that decision as a digital signal. With a 4.6 rating and ten included modules, it is a practical choice for robots, educational builds, and Arduino-controlled relays.
We may earn a commission when you buy through this link, at no additional cost to you.
The stated operating behavior changes the digital output depending on whether the environment is brighter or darker than the set level. A potentiometer establishes the threshold on the board, so an Arduino can read the output as a straightforward high or low state. The listing also notes that the output can directly drive a relay module to create a light-operated switch.
This simplicity is the product's primary advantage, but it also establishes its limit. A binary output does not communicate how far the light level sits from the threshold, which can make smooth dimming or detailed environmental analysis impossible. Physical placement, reflected light, and local shadows can also influence the transition point and cause behavior that feels inconsistent.
Choose this product for night-triggered lighting, robot behavior, automatic switches, and teaching projects centered on digital inputs. It is less appropriate for measurement applications or systems that need analog brightness levels. For the intended threshold use case, however, its simple logic and adjustable board are genuinely useful.
The digital output removes the need to interpret a fluctuating analog value. An Arduino can directly decide whether to activate a lamp, relay, buzzer, or other controlled device based on the selected light threshold.
Adjusting the on-board potentiometer lets a builder set the transition directly in the intended environment. This is useful when the enclosure, sensor orientation, and ambient reflections are already known.
We may earn a commission when you buy through this link, at no additional cost to you.
This four-module digital LDR package offers broad compatibility and an approachable way to add light detection to many embedded projects. Its 4.6 rating, adjustable threshold, and support for Arduino, ESP32, ESP8266, and Raspberry Pi make it a particularly versatile selection for makers who work across more than one platform.
We may earn a commission when you buy through this link, at no additional cost to you.
The module provides both a digital low or high output and an analog output. That gives users the option of reading a binary light condition or observing a changing voltage, while the 3.3 to 5V DC supply range supports common microcontroller logic levels. The listing also states that Arduino, ESP32, and ESP8266 tutorials are provided, which can shorten initial setup.
The underlying LDR still measures relative illumination rather than providing a calibrated lux value. Physical placement and environmental variation remain important, and the analog output will not have the direct measurement purpose of a BH1750. As with other threshold modules, users may need to combine the readings with code calibration when consistent behavior matters.
This product suits multi-platform automation projects, connected devices, educational kits, and builders who want one sensor type across several boards. It is especially helpful for prototypes that need either a simple trigger or a changing analog signal. The four-pack makes it convenient to keep a spare available while testing enclosure placement.
Compatibility with Arduino, ESP32, ESP8266, and Raspberry Pi lets teams reuse the same sensing approach across different controllers. The stated tutorial support adds practical value for creators starting with an unfamiliar board.
The digital output supports direct condition-based control, while the analog signal adds useful variation for thresholding in software. This dual approach lets a single module serve both simple and more exploratory sketches.
We may earn a commission when you buy through this link, at no additional cost to you.
The 50-piece GL5516 set is an impressive value-oriented option for builders who need many light-sensitive resistors. It holds the highest rating among the listed products at 4.9 and offers enough components for extensive prototyping, classroom use, automated lighting experiments, and multi-sensor assemblies.
We may earn a commission when you buy through this link, at no additional cost to you.
The listed bright resistance is 5 to 10 kilohms, while dark resistance can reach 0.2 megohms. Those values provide a clear indication of how the resistance changes with illumination, allowing an Arduino analog input to interpret the sensor through a voltage divider. The listing identifies compatibility with Arduino, ESP32, ESP8266, Raspberry Pi, and other 3.3 or 5V microcontrollers.
This is not a ready-made module, so users must add a fixed resistor, wires, and often a pull-up or pull-down arrangement. Individual resistor variation, ambient conditions, and the nonlinear response of an LDR can affect results. The set is therefore better for learning, prototyping, and automation than for applications requiring calibrated lux precision.
This pack is a strong recommendation for budget-conscious students, educators, robotics clubs, and solar-tracking experiments. It also works well when the goal is to experiment with different sensor placements before designing a permanent board. Projects needing one immediate, regulated output should instead select a module with a comparator.
A large collection makes it easy to compare resistor behavior across several prototype circuits. Students can also retain spare parts for projects without repeatedly searching for another compatible component.
The changing resistance provides a workable signal for finding brighter directions or triggering lighting controls. It suits proof-of-concept projects where cost and component availability matter more than calibrated measurement.
We may earn a commission when you buy through this link, at no additional cost to you.
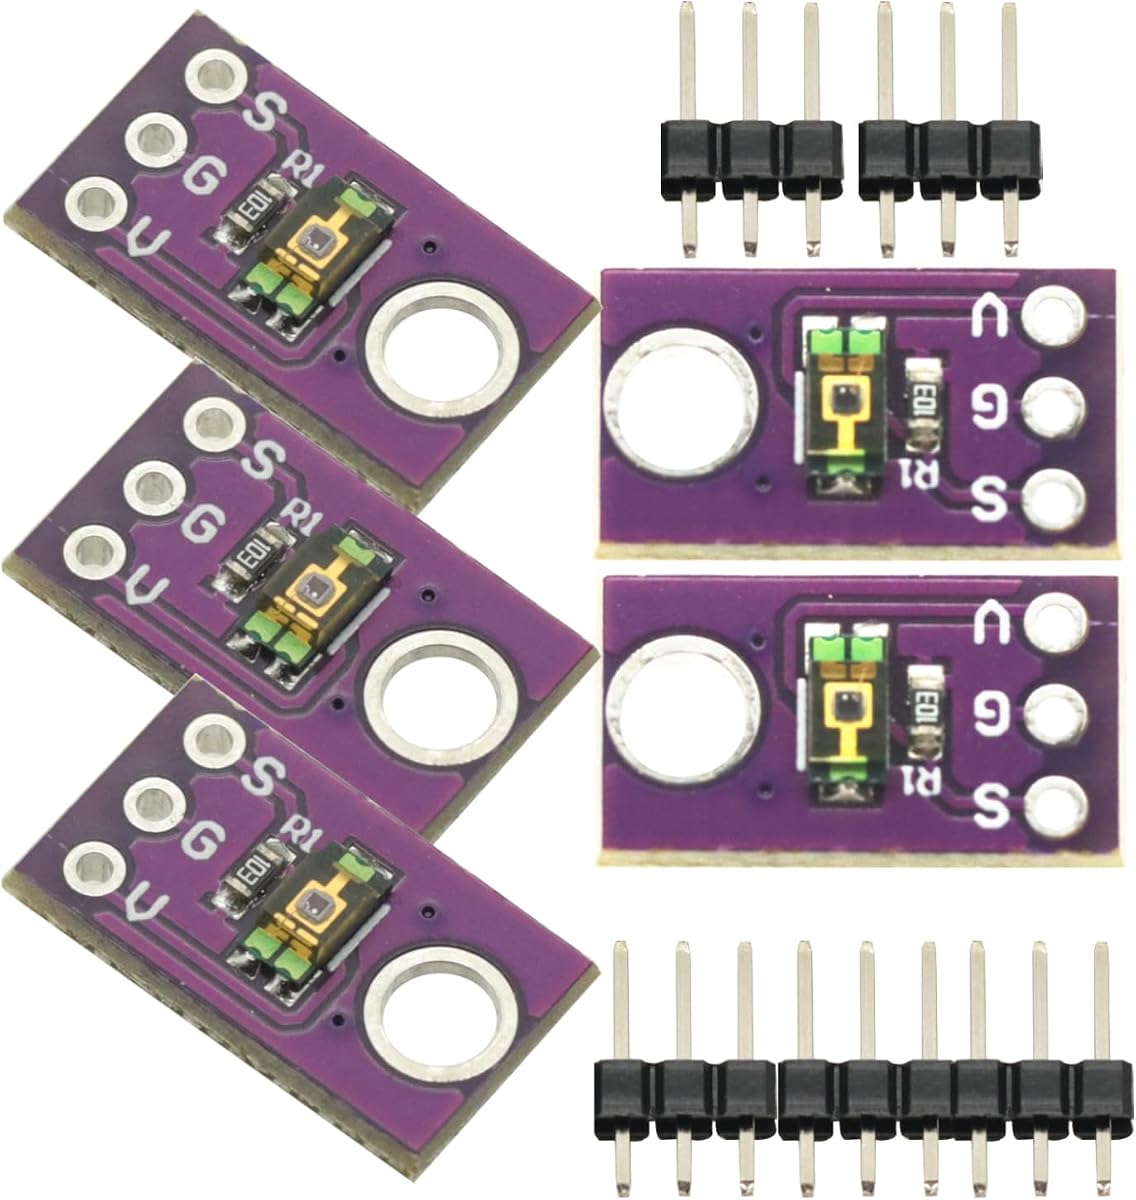
The TEMT6000 five-pack is designed around a focused purpose: measuring ambient light where automatic brightness or lighting control is useful. It carries a perfect 5.0 product rating, making it highly regarded within the supplied listings, although that rating should not be mistaken for a claim of independent laboratory testing.
We may earn a commission when you buy through this link, at no additional cost to you.
TEMT6000 sensors are associated with ambient light measurement in display backlight dimming, keypad backlighting, and industrial on-or-off lighting control. Five modules allow an Arduino project to be deployed in multiple locations or used for comparisons. This makes the pack especially interesting for makers designing responsive interfaces and intelligent lighting demonstrations.
The main limitation is the limited detail provided in the listing. It does not state the module dimensions, operating voltage, exact output type, or required interface. Those details should be confirmed from the board's markings and documentation before wiring it to a particular controller. Its specialized purpose also means it may be less attractive than a general BH1750 for general illumination experiments.
Choose this product when the intended result closely matches its stated applications, such as an Arduino-controlled LCD that dims in a dark room or an industrial lighting demonstration. The five-pack is valuable for multi-location installations. For broad measurement projects where interface and electrical details are important, verify compatibility thoroughly or select the more fully specified BH1750 module.
A TEMT6000-based module aligns closely with projects that respond to surrounding light rather than aim at one source. This makes it relevant to automatic display brightness and general room-lighting behavior.
Five identical sensors can support a prototype with several independently controlled zones. They are also useful for comparing how light levels differ around a room or work surface.
We may earn a commission when you buy through this link, at no additional cost to you.
The uxcell photodiode module is a compact option aimed particularly at smart-car and light-detection builds. Its 4.6 rating reflects a well-regarded product, while the combination of an LM393 comparator, digital output, analog voltage output, and 3.3 to 5V operation gives Arduino builders several ways to interpret the sensor.
We may earn a commission when you buy through this link, at no additional cost to you.
Digital detection is useful when a vehicle or device only needs to know whether a light is present. The analog output can support finer comparisons and directional control. The wide-voltage comparator is intended to provide stable switching, and the small module format makes it easier to mount near the front of a compact robotic chassis.
As with other photodiode boards, alignment matters more than it does for ambient light sensors. A bright source outside the sensor's preferred direction may produce a weaker response, while reflections and nearby surfaces can influence the result. The fixed threshold may therefore require adjustment in code or on the board after the module is installed.
This three-pack suits hobby robots, line-of-sight light detectors, and small smart-car experiments where direction and size matter. It is less appropriate for projects seeking comprehensive ambient-light measurements across a room. Choose it when a photodiode's directional behavior is a feature and when both digital and analog access is useful.
The module's small board format suits installations where the front of a robot must remain uncluttered. Digital and analog outputs allow the same sensor to support either simple or more exploratory control logic.
The listed 3.3 to 5V range and LM393 comparison stage support common microcontroller systems. Buyers should still confirm the specific board's pin labels and electrical markings before making final connections.
We may earn a commission when you buy through this link, at no additional cost to you.
Choosing an Arduino light sensor means matching the sensing technology, electrical interface, output type, and physical setup to the behavior your project actually needs.
An LDR changes resistance as illumination changes and is inexpensive, flexible, and easy to prototype. A photodiode is more directional and can help a robot seek a concentrated source. A BH1750 provides structured light-intensity measurements, while a TEMT6000 is tailored to ambient-light and display-dimming tasks. The best choice depends on whether you need a simple threshold, a directional reading, or a numerical illumination value.
Match the sensor to the task rather than choosing solely by output sophistication. An ambient module is usually unnecessary for a basic night lamp, while a bare photoresistor may be too crude for a calibrated lighting logger.
Digital outputs are convenient when the Arduino only needs to know whether a condition has been met. They simplify code and work well for relays, automatic lamps, and light-triggered robots. Analog outputs expose a changing voltage, allowing the sketch to observe gradual brightness changes, but they usually require threshold decisions and calibration in software.
Some modules provide both outputs, giving you flexibility during development. Choose digital-first for simple switching, analog for responsive behavior, and a dedicated measurement sensor when raw brightness values are the main objective.
Most modules in this category operate across 3.3 to 5V, but the board markings and stated specifications should still be checked. An Arduino Uno commonly uses 5V logic, while many ESP32, ESP8266, and RP2040 projects use 3.3V logic. A wide operating range is convenient, but safe power, common ground, and correct pin identification remain essential.
Confirm the sensor interface before wiring. Digital and analog modules use different pins, and I2C modules such as the GY-302 require address-aware code and appropriate pull-up arrangements where needed.
Relative sensors are adequate for detecting darkness, finding a brighter direction, or switching a lamp. Structured sensors are better when your sketch needs consistent numeric readings across changing ambient conditions. If the project involves logging, calibration, display dimming, or comparisons between locations, review the sensor's measurement purpose rather than choosing by package size alone.
Also consider environmental variables. Direct sunlight, reflections, shadows, enclosure color, and sensor placement can influence results. A more specialized sensor does not eliminate the need to mount and calibrate it correctly.
Ambient light sensors generally collect light from a broad area, while photodiodes can be more sensitive to a source in front of them. Directional behavior is valuable for light-seeking robots but can be a drawback for room-wide dimming. Standalone LDRs also have broad responses, though their placement and housing affect what they detect.
Think about where the light source will be relative to the board. For a lamp-following vehicle, a photodiode may be ideal. For a screen that should respond to overall room brightness, choose an ambient module and position it away from direct glare.
The BH1750 boards measure 13.9 by 18.5mm, while the photodiode board is listed at 3.2 by 1.4cm. These dimensions suit compact robots and displays, but the sensor still needs to sit outside opaque enclosure walls. Larger sensor boards may be easier to handle during a first build but less convenient in a tightly packed assembly.
Look for fixing holes, accessible adjustment potentiometers, and clear pin labels. Mechanical stability matters because shifting the sensor can change how much light reaches it and undermine calibration.
Multipacks can be useful for classrooms, robotics teams, multiple prototypes, and spare parts. Sets containing 30 or 50 standalone photoresistors offer the most freedom for experimentation, while module packs are better when builders want identical ready-made boards. A large pack is unnecessary if the final project uses only one sensor.
Consider whether a multipack helps compare placement or assemble several units. If not, a smaller option may reduce excess components while offering a more focused Arduino build.
Simple LM393 modules can be connected through power, ground, and a labeled output pin, then controlled with basic digital reads. Analog readings require an analog-capable input. BH1750 modules communicate over I2C and depend on suitable libraries, while direct-output modules may have a straightforward comparison stage.
Review example code and tutorials before finalizing the purchase. Some listings, including the four-piece digital LDR option, explicitly mention Arduino, ESP32, and ESP8266 tutorials. Software support can make a technically suitable sensor much easier to integrate.
Begin by identifying the sensor's interface and pin labels. Connect the module to the correct Arduino power and ground pins, then attach either its digital, analog, or I2C connections as appropriate. Before applying power, verify that the supply voltage is within the listed range and that the sensor will not be obstructed by an opaque enclosure.
Test the sensor in its intended environment rather than on a cluttered workbench. For a threshold module, adjust the potentiometer until the digital output changes at the desired light level. For an analog or BH1750 module, open the Arduino Serial Monitor and compare readings in bright, dim, and dark conditions. Record enough information to establish a sensible trigger point.
Afterward, secure the sensor in a stable position, keep the sensing area clean, and protect the board from moisture and direct electrical damage. Recalibrate if the enclosure, room layout, or surrounding reflective surfaces change. Allow for normal variation in ambient light, avoid repeatedly moving the sensor after calibration, and select wiring limits appropriate to the module and Arduino board.
A module is easier for most beginners because it often includes a comparator, labeled pins, and an adjustable threshold. A standalone photoresistor is better when you want to design a custom voltage divider or create a compact circuit around a specific form factor. The module is generally faster to connect, while the bare component offers more circuit-design freedom.
The GY-302 BH1750 modules are designed specifically for light-intensity measurement and use a BH1750FVI chip from ROHM. The TEMT6000 is also oriented toward ambient light and display dimming. An LDR can show relative changes, but it does not provide the same type of structured illumination measurement.
Several listed products explicitly support 3.3 to 5V microcontrollers, including the ESP32, ESP8266, and Raspberry Pi. Compatibility depends on the module interface: digital and analog boards connect through general pins, while BH1750 modules require I2C wiring and suitable software support. Confirm the board's pin labels and logic voltage before connecting it.
An LDR changes resistance based on overall illumination and generally responds across a broad area. A photodiode generates a signal related to incident light and can be more directional, making it useful for finding a specific source. The photodiode modules in this guide can therefore suit light-seeking robots better than general room-lighting control.
Use the digital output for straightforward high-or-low decisions, such as turning on a lamp when it becomes dark. Use the analog output if you want to examine gradual changes and choose thresholds in Arduino code. Modules with both outputs allow you to prototype either behavior and can simplify comparisons between different sensor positions.
Enclosures, reflectors, nearby components, shadows, and sensor angle can change the amount of light reaching the sensor. A setting adjusted on an open desk may behave differently inside a robot or enclosure. Test the module in its final position, shield it from unintended reflections, and recalibrate after any mechanical change.
Not all of them do. LDR and photodiode outputs generally represent changing light conditions rather than a standardized lux value. A BH1750 is intended for intensity measurement, but accuracy still depends on correct orientation, suitable calibration, and the ambient conditions in which it operates.
An LM393 LDR module with a digital output is usually the simplest starting point. It can be connected to a relay or controlled output, and its potentiometer can be adjusted until darkness triggers the desired state. The Arduino only needs to read the high or low signal when software control is required.
The 3-pack GY-302 BH1750 is the most compelling all-around recommendation for projects that need structured light-intensity readings in a compact format. The 50-piece GL5516 set leads for inexpensive experimentation, while the four-piece digital LDR module combines broad platform support, dual outputs, and tutorial assistance.
Prioritize the output your project actually needs. Choose a digital comparator module for simple automatic switches, a photodiode for directional light seeking, an analog-capable LDR board for relative changes, and a BH1750 or TEMT6000 for ambient-light measurement. Also account for voltage, mounting space, enclosure reflections, and software support before ordering.
Product listings, ratings, availability, and prices can change, so check the current details before making a final purchase. Comparing the module interface with your Arduino board and the project environment is the most reliable way to choose a suitable sensor and avoid unnecessary complexity.